1. Pyqt5环境安装
使用miniconda创建一个新环境作为pyqt5的开发。这里使用的python3.8版本,网上说太高的python3.10版本无法同时安装pyqt5和pyqt-tools。
1
conda creat -n pyqt5 python=3.8
然后激活刚刚创建的环境(pyqt5),如果没有换源的请按照以下指令更换conda镜像源和pip镜像源,提升python包的下载速度。
1
2
3
4
5
6Conda 镜像源
conda config --add channels https://mirrors.tuna.tsinghua.edu.cn/anaconda/pkgs/main/
conda config --add channels https://mirrors.tuna.tsinghua.edu.cn/anaconda/pkgs/free/
conda config --add channels https://mirrors.tuna.tsinghua.edu.cn/anaconda/pkgs/r/
conda config --add channels https://mirrors.tuna.tsinghua.edu.cn/anaconda/cloud/pytorch/
conda config --set show_channel_urls yes1
2
3
4pip 临时换源
pip install <package_name> -i https://pypi.tuna.tsinghua.edu.cn/simple
pip 永久换源
pip config set global.index-url https://pypi.tuna.tsinghua.edu.cn/simple安装Pyqt5 和Pyqt5-tools
1
2
3
4Pyqt5安装
pip install PyQt5
Pyqt5-tools 安装
pip install PyQt5-tools通过
conda list查看已经安装的包,此时安装的Pyqt版本是5.15.9,Pyqt5.15.x及以后的版本除了安装上述两个包之外,还安装了pyqt5-sip、qt5-applications、qt5-tools。
设置环境变量
D:\LenovoSoftstore\Miniconda\envs\pyqt5\Lib\site-packages\PyQt5\Qt5\plugins
2. Pycharm配置QtDesigner
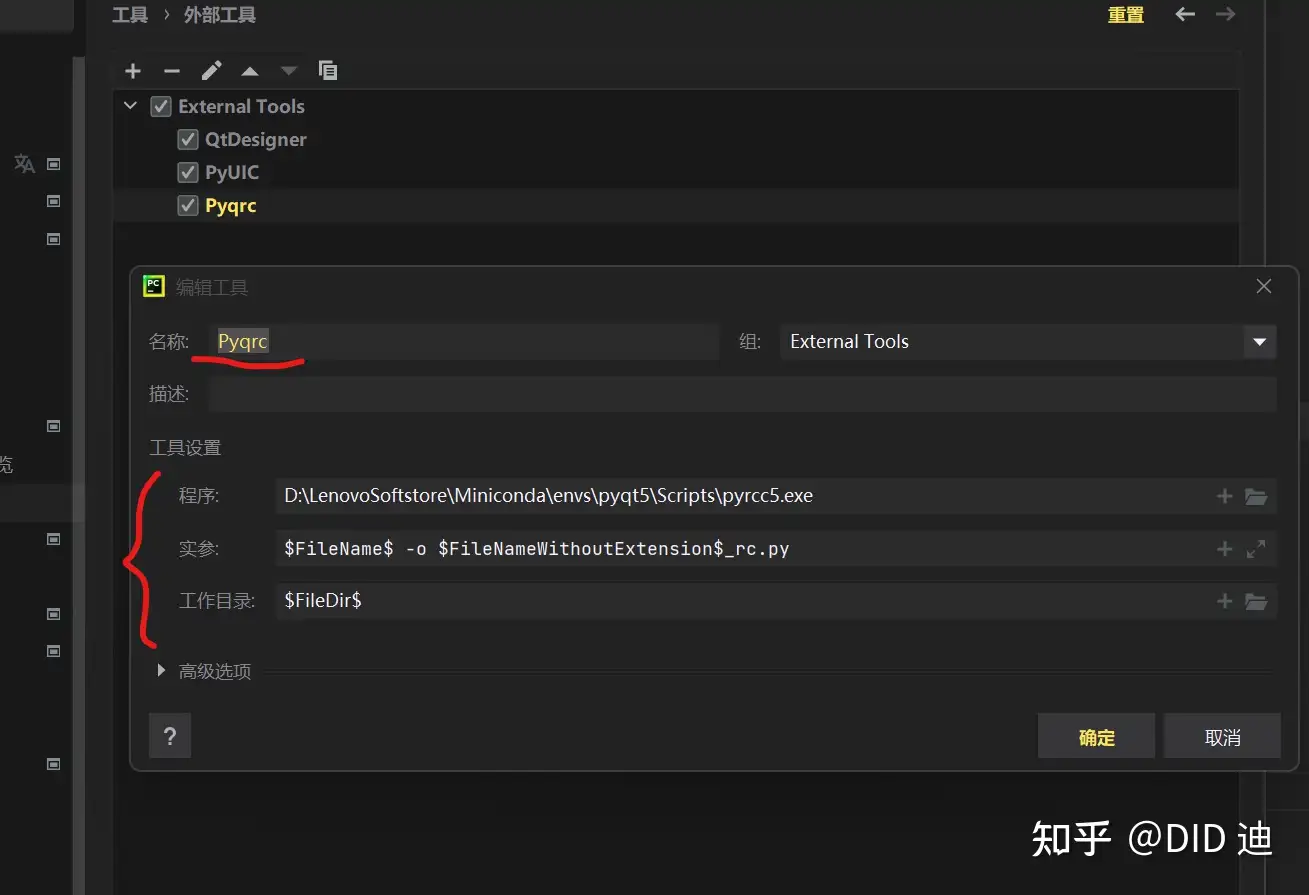
打开Pycharm,设置,外部工具,添加三个外部工具
QtDesigner、PyUIC、Pyqrc,设置程序路径如下图所示。

然后我们可以在工具->外部工具里面找到刚刚定义的
QtDesigner、PyUiC、Pyqrc。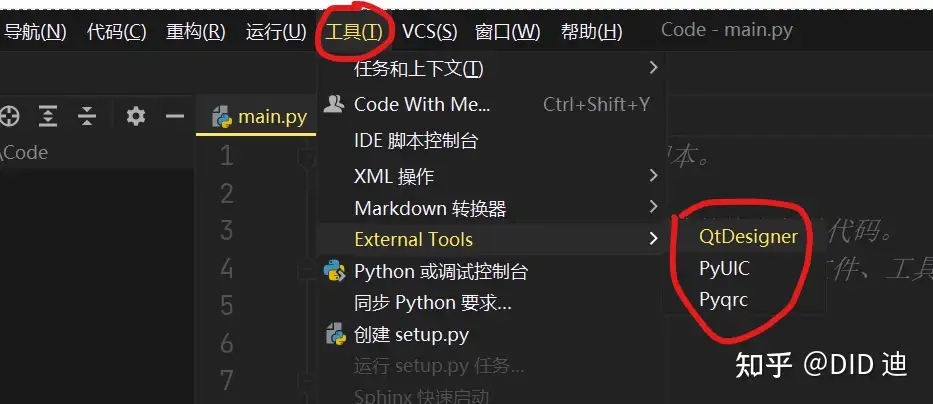
点击QtDesigner 即可打开Qt设计师。
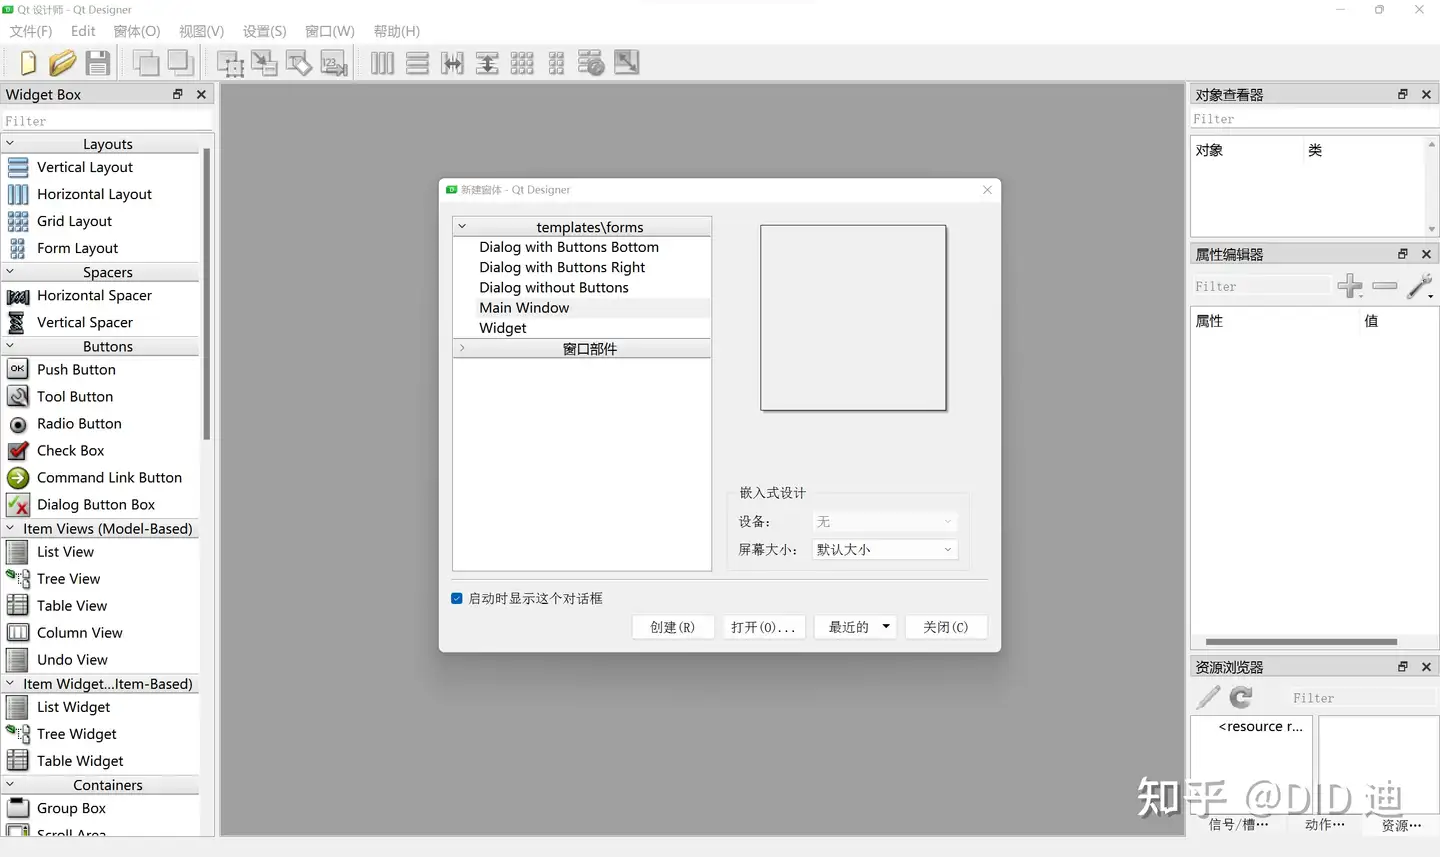
验证Pyqt5是否正常工作先用QtDesigner随便拖几个部件,保存为
Test.ui文件。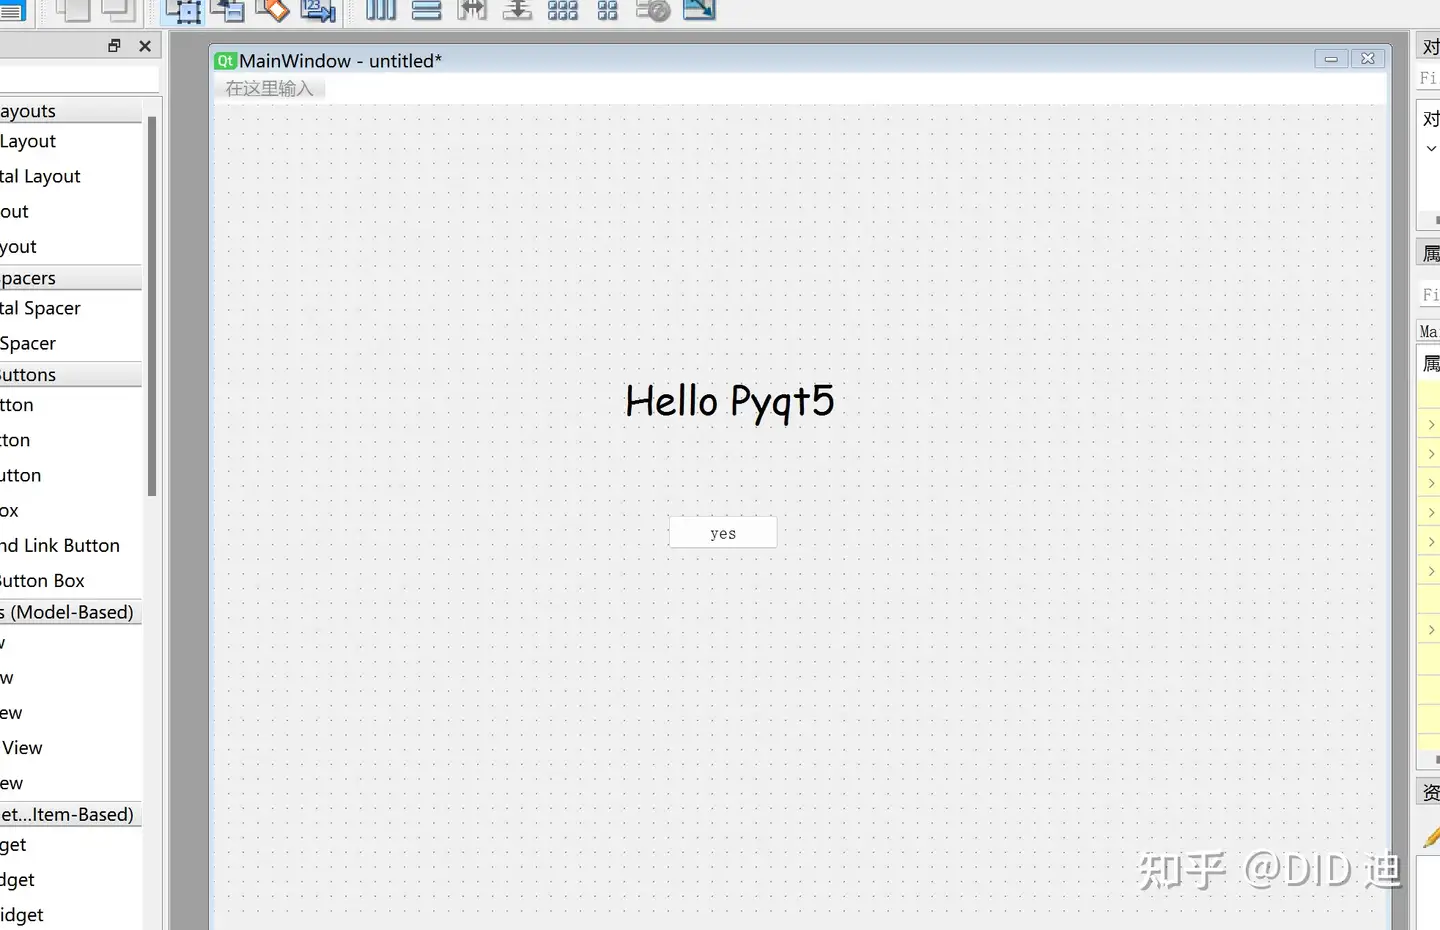
然后我们回到Pycharm,发现刚刚生成的Test.ui,右键用前面配置的外部工具PyUIC将其转化为.py文件。

文件夹多了一个
Test.py文件出来,就是刚刚我们用QtDesigner设置的界面。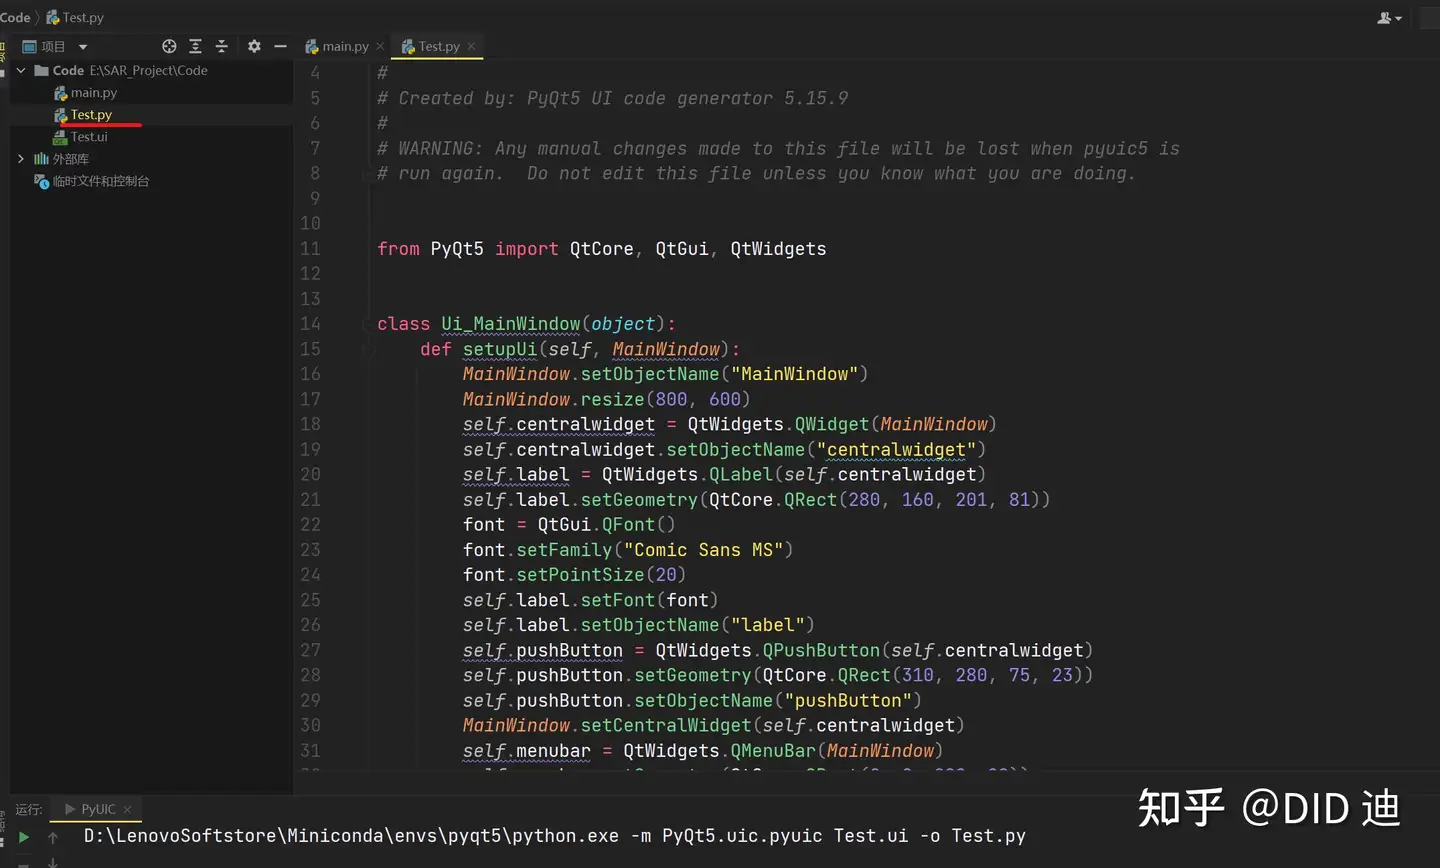
接着在mian函数中调用这个界面并显示,写入以下代码运行,即可看到刚刚创建的界面。
1
2
3
4
5
6
7
8
9
10
11
12
13
14
15
16import sys
from PyQt5 import QtCore, QtGui, QtWidgets
import Test # 导入QtTest文件
def main():
# 获取UIC窗口操作权限
app = QtWidgets.QApplication(sys.argv)
MainWindow = QtWidgets.QMainWindow()
# 调自定义的界面(即刚转换的.py对象)
Ui = Test.Ui_MainWindow() # 这里也引用了一次Test.py文件的名字注意
Ui.setupUi(MainWindow)
# 显示窗口并释放资源
MainWindow.show()
sys.exit(app.exec_())
if __name__ == '__main__':
main()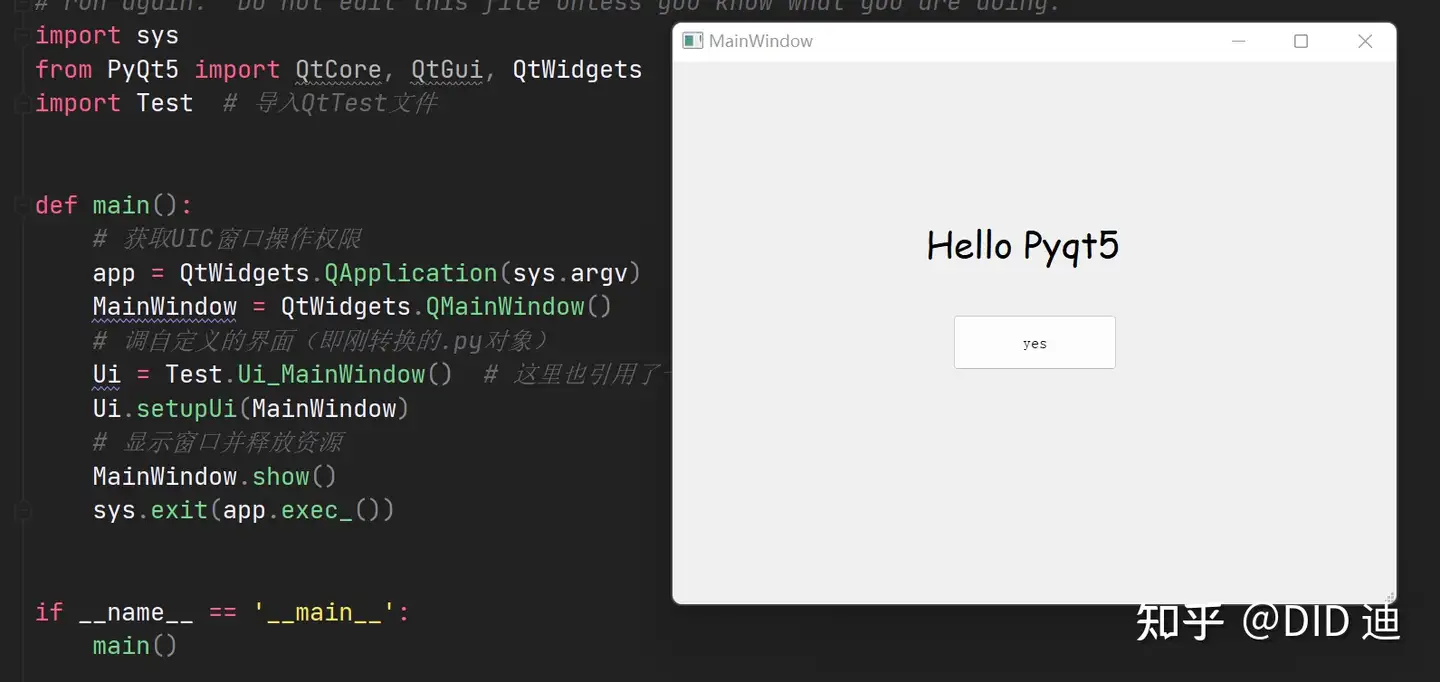
3. PyQt-Fluent-Widgets插件安装
PyQt-Fluent-Widets是一个使用 PyQt/PySide 编写的 Fluent Design 风格的组件库,包含许多常用的组件,支持亮暗主题无缝切换和自定义主题色,支持 PyQt5/PyQt6/PySide2/PySide6。
conda 环境中安装Pyqt-Fluent-Widgets
1
pip install "PyQt-Fluent-Widgets[full]"
下载github包,运行示例,基本风格和windows 一样。
1
2
cd examples/gallery
python demo.py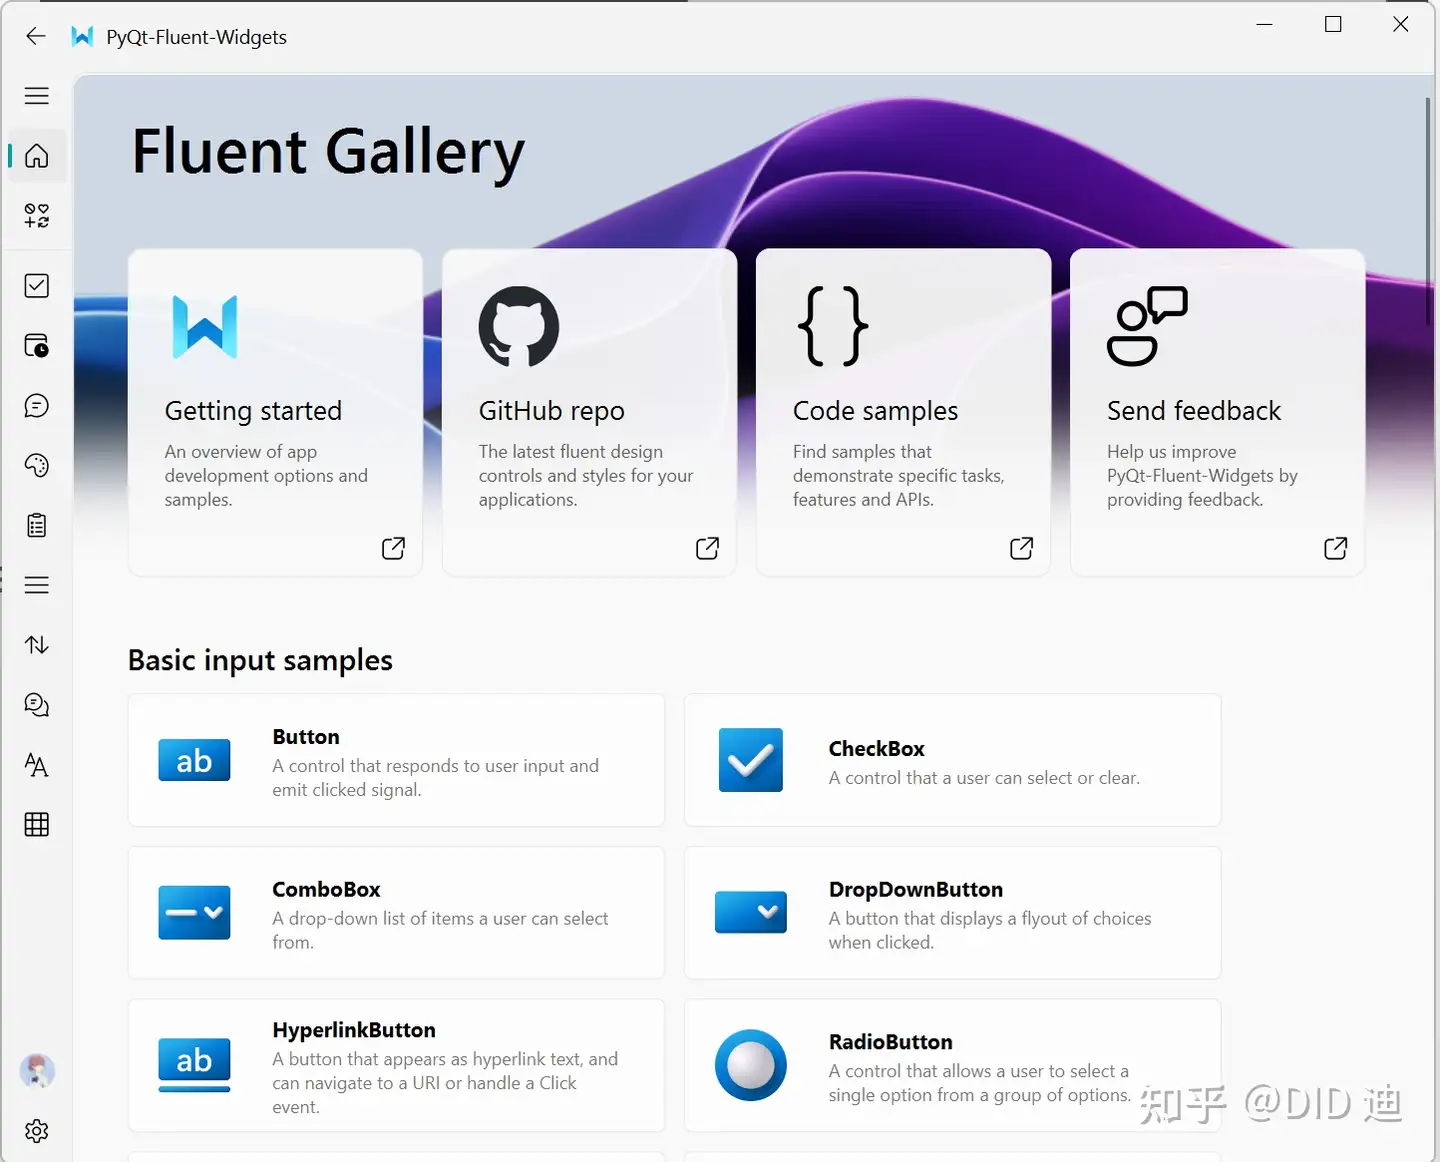
4. 在QtDesigner中使用PyQt-Fluent-Widgets
在 Qt Designer 中,有两种使用 PyQt-Fluent-Widgets 的方式。
右击一个小部件,选择右击菜单上的提升为, 是把原生部件替换成自定义小部件,在这个例子中是
qfluentwidgets.PushButton
弹出的对话框上需要填写自定义的组件名。头文件是组件库的包名
qfluentwidgets,提升的类名称为PushButton。
完成提升后不会在设计师中看到任何变化,保存 ui 文件后编译为 py 代码,可以发现
import的是PushButton第二种方法是使用插件。
运行
python ./tools/designer.py来启动设计师软件(必须使用脚本启动)一切无误的情况下能在侧边栏 Widget Box 中看到 PyQt-Fluent-Widgets 的组件。
