说在前面
- 由于学生可以免费申请使用Github Copilot,但只能进行代码提示,而github上有个项目(copilot-gpt4-servicehttps://github.com/aaamoon/copilot-gpt4-service
能够使Copilot转为ChatGPT,因此本文通过网上搜集配置了一下ChatGPT4并成功使用,文章主要参考了CSDN和知乎的文章 https://blog.csdn.net/G_1012_/article/details/129730072 https://zhuanlan.zhihu.com/p/618772237 https://zhuanlan.zhihu.com/p/678563697。
1. WSL2安装(Ubuntu 20.04)
- WSL2是适合在win10/win11上安装Linux子系统,相关安装方法请参考本人之前发布的文章(在Windows11中安装WSL2(Ubuntu20.04)并配置Anaconda环境)https://zhuanlan.zhihu.com/p/639611152
2. docker 安装
首先进入WSL2 (Ubuntu 20.04)更新apt包索引
1
sudo apt update
安装依赖包
1
sudo apt install apt-transport-https ca-certificates curl gnupg2 software-properties-common
添加 Docker 的官方 GPG 密钥:
1
curl -fsSL https://download.docker.com/linux/ubuntu/gpg | sudo apt-key add -
官方安装
1
2
3
4
sudo add-apt-repository \
"deb [arch=amd64] https://download.docker.com/linux/ubuntu \
(lsb_release -cs) \
stable"docker 启动
1
sudo service docker start
3. Copilot 学生认证
看到知乎上有文章写的很详细了,这里直接引用链接。
4. 安装 copilot-gpt4-service 服务
在刚刚安装好的WSL+docker环境中用以下代码来部署:
1
2
3
4
5
6
docker run -d \
--name copilot-gpt4-service \
--restart always \
-p 8080:8080 \
-e HOST=0.0.0.0 \
aaamoon/copilot-gpt4-service:latest
获取Github Copilot Token:这里采用的是官方处理.py文件获取github Token:
复制官网get_copilot_token.py 文件:https://github.com/aaamoon/copilot-gpt4-service/blob/master/shells/get_copilot_token.py
在本地运行之后会让你打开链接并输入验证码:

然后在github授权一下,紧接着程序就输出Copilot Token了,记得复制这个Token,后面会用到。

- 安装配置第三方客户端, 使用ChaGPT
这里也是使用的ChatGPT-Next-Web https://link.zhihu.com/?target=https%3A//github.com/ChatGPTNextWeb/ChatGPT-Next-Web
仍然在WSL中dorker使用下面代码部署
1 | docker run -d -p 3000:3000 \ |
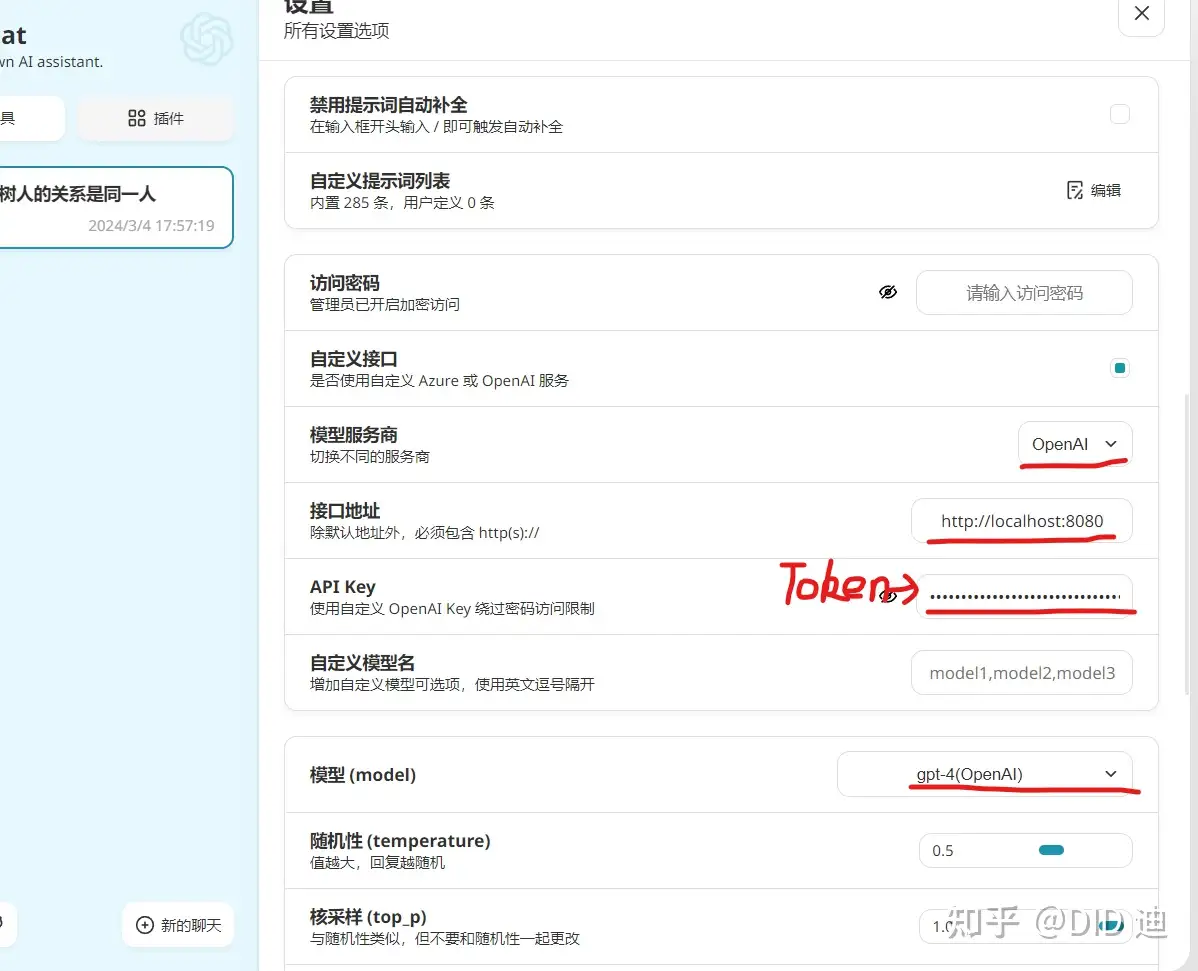
安装完成之后直接在浏览器访问本地地址http://localhost:3000/(前端地址)
在设置中输入您之前配置好的copilot-gpt4-service 服务的地址(后端地址),以及之前获取到的token,即可。

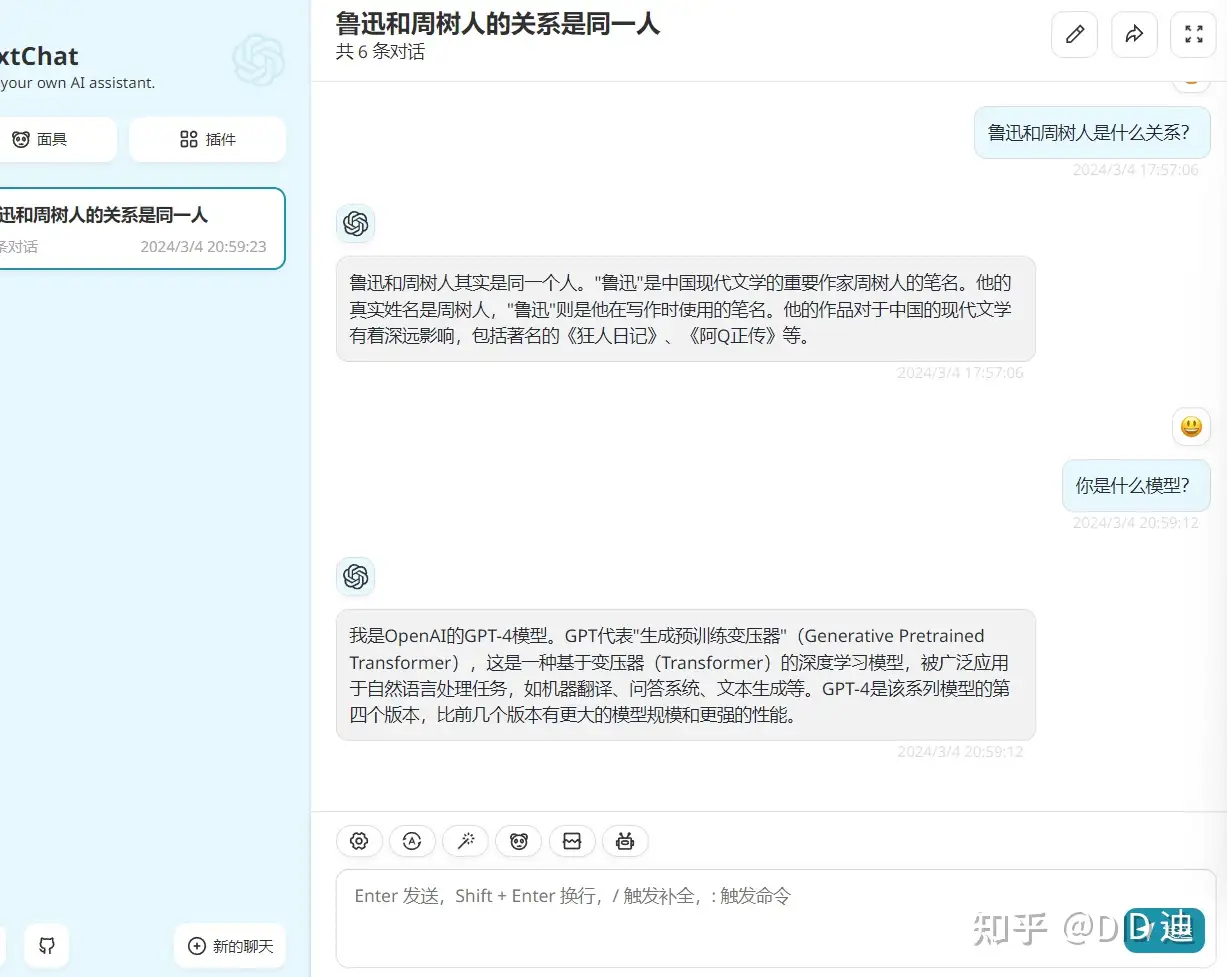
经测试本地GPT4部署成功:

5. 注意事项!
